
RAM is one of the critical components in a computer and is often the frequent cause of blue screen errors. MemTest86 is the preferred software for checking RAM. It's currently the best RAM testing tool available.
1. What is MemTest86?
MemTest86 is a high-performance RAM testing software developed by PassMark Software. It offers both Free and Paid versions. While the Free version limits certain features, the Paid version is suitable for users with specific demands such as technicians, testers, or company RAM labs. Therefore, regular users are recommended to use the Free version as it provides all necessary features.
Homepage: MemTest86
2. Preparation
To test RAM with MemTest86, you'll need to prepare the following essentials:
- USB with a minimum capacity of 4GB
- Skills in BIOS motherboard
In the preparation section, the most crucial item is the USB drive because MemTest86 operates directly on the computer system rather than through the Windows operating system. Therefore, you need a separate USB to create a bootable tool for RAM testing.
Alongside using the USB to create a separate boot for the system, you also need skills related to BIOS, primarily the ability to switch boot options on the computer. For more BIOS-related skills, you can refer to the following articles:
- Shortcut keys for accessing Boot Options, Boot Menu on Asus, Dell, HP, Sony, etc.
- How to fix computer not recognizing USB Boot
- How to access BIOS on computers, laptops
3. Setting up USB Boot for RAM testing
After preparing all the necessary supporting devices for testing RAM on the computer, we will begin setting up each part.
Step 1: Proceed to access the MemTest86 homepage to download the software to your computer.
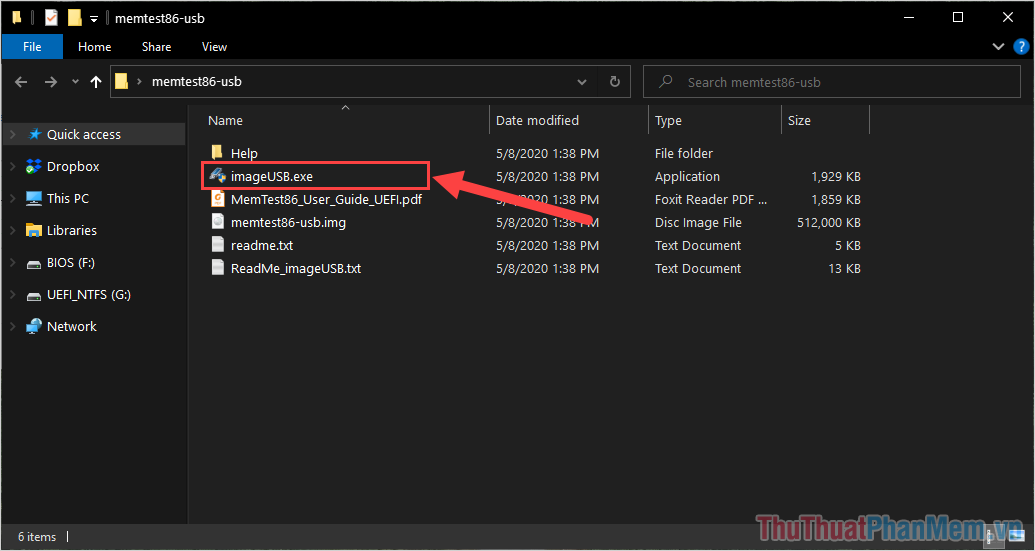
Step 2: Then, plug the USB into the computer and select the file 'imageUSB.exe' to launch the software.
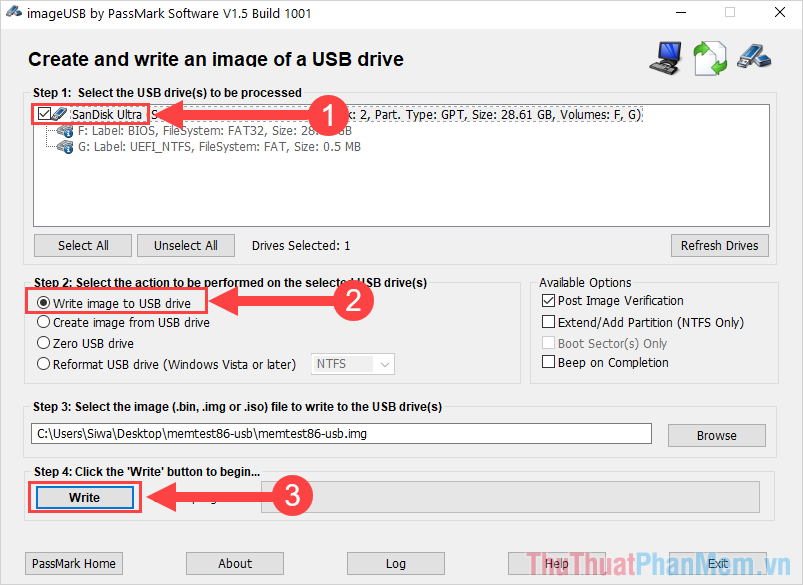
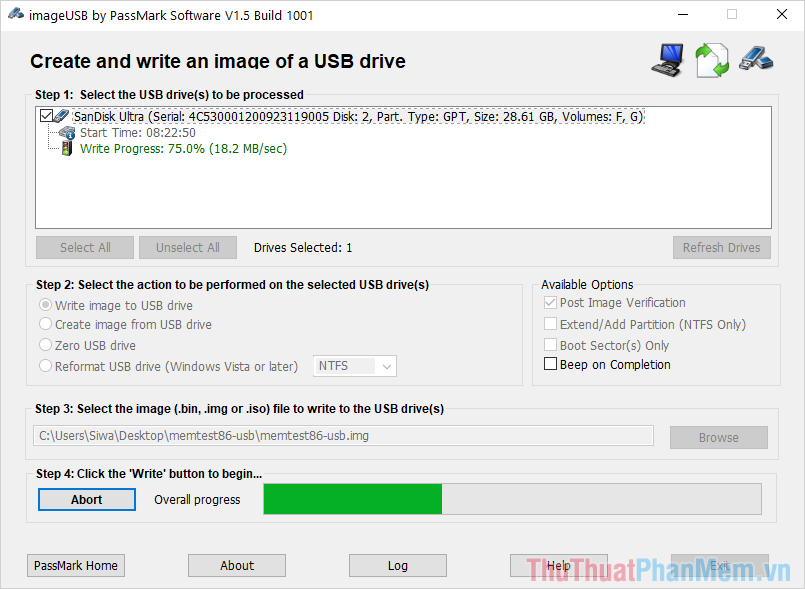
Step 3: When the MemTest86 software is launched, proceed to configure the following information:
- Choose the USB you want to create the RAM Test Boot
- Select the Write image to USB driver option to create a bootable drive for the USB
- Click Write to begin copying data to the USB
Note: All data on the USB will be lost due to formatting.
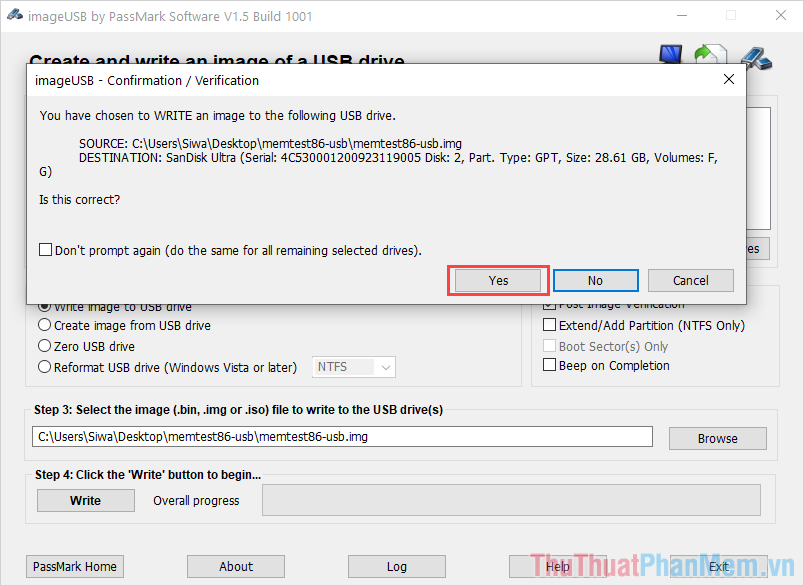
Step 4: In the warning window, select Yes to start the system and copy data to your USB.
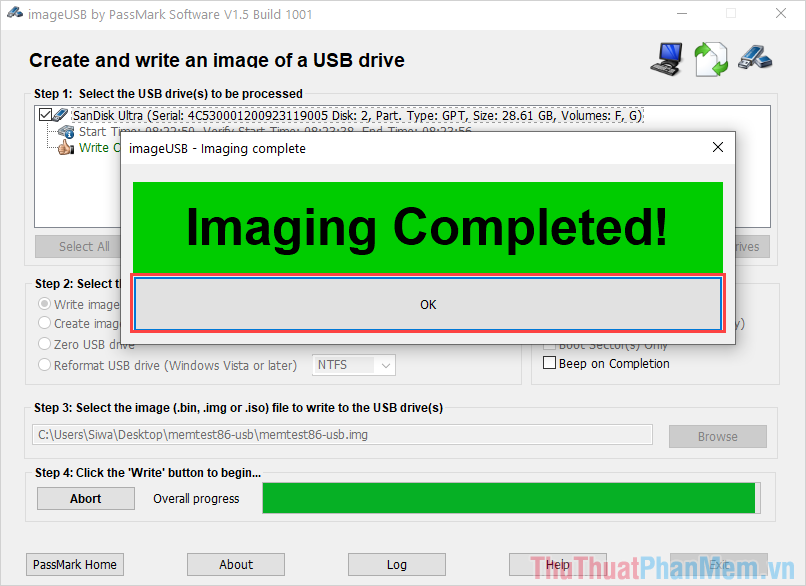
Step 5: The USB Boot creation process will take approximately 3-5 minutes; after completion, you will receive a 100% notification.
Step 6: Once the USB Boot creation process is complete, press OK to finish.
Step 7: Before using the USB to boot on the computer, we will need to double-check. Select the Log section on the MemTest86 interface.
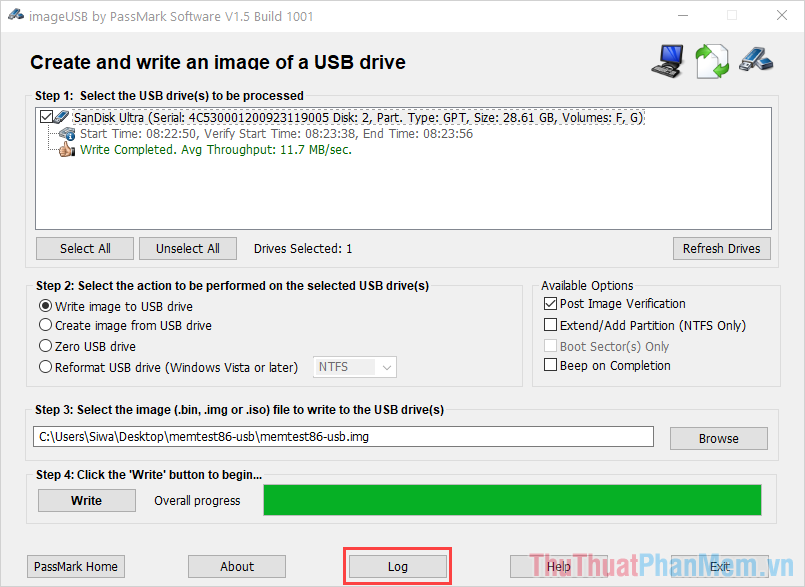
Step 8: In the Log window, pay attention to the MD5 and SHA1 sections; if they match and show MATCHED, it means success.

4. Changing BIOS Boot
To initiate MemTest86, you need to change the Boot settings on your computer to Boot from the newly created USB.
Step 1: After creating the USB Boot, restart your computer and press F2/ DEL to access the BIOS.
Step 2: In the motherboard's BIOS, locate the Boot Options and select the Default Boot to USB option for the RAM Test tool you just created.

5. Perform RAM Testing with MemTest86
When the computer Boots into the RAM testing USB, follow these steps:
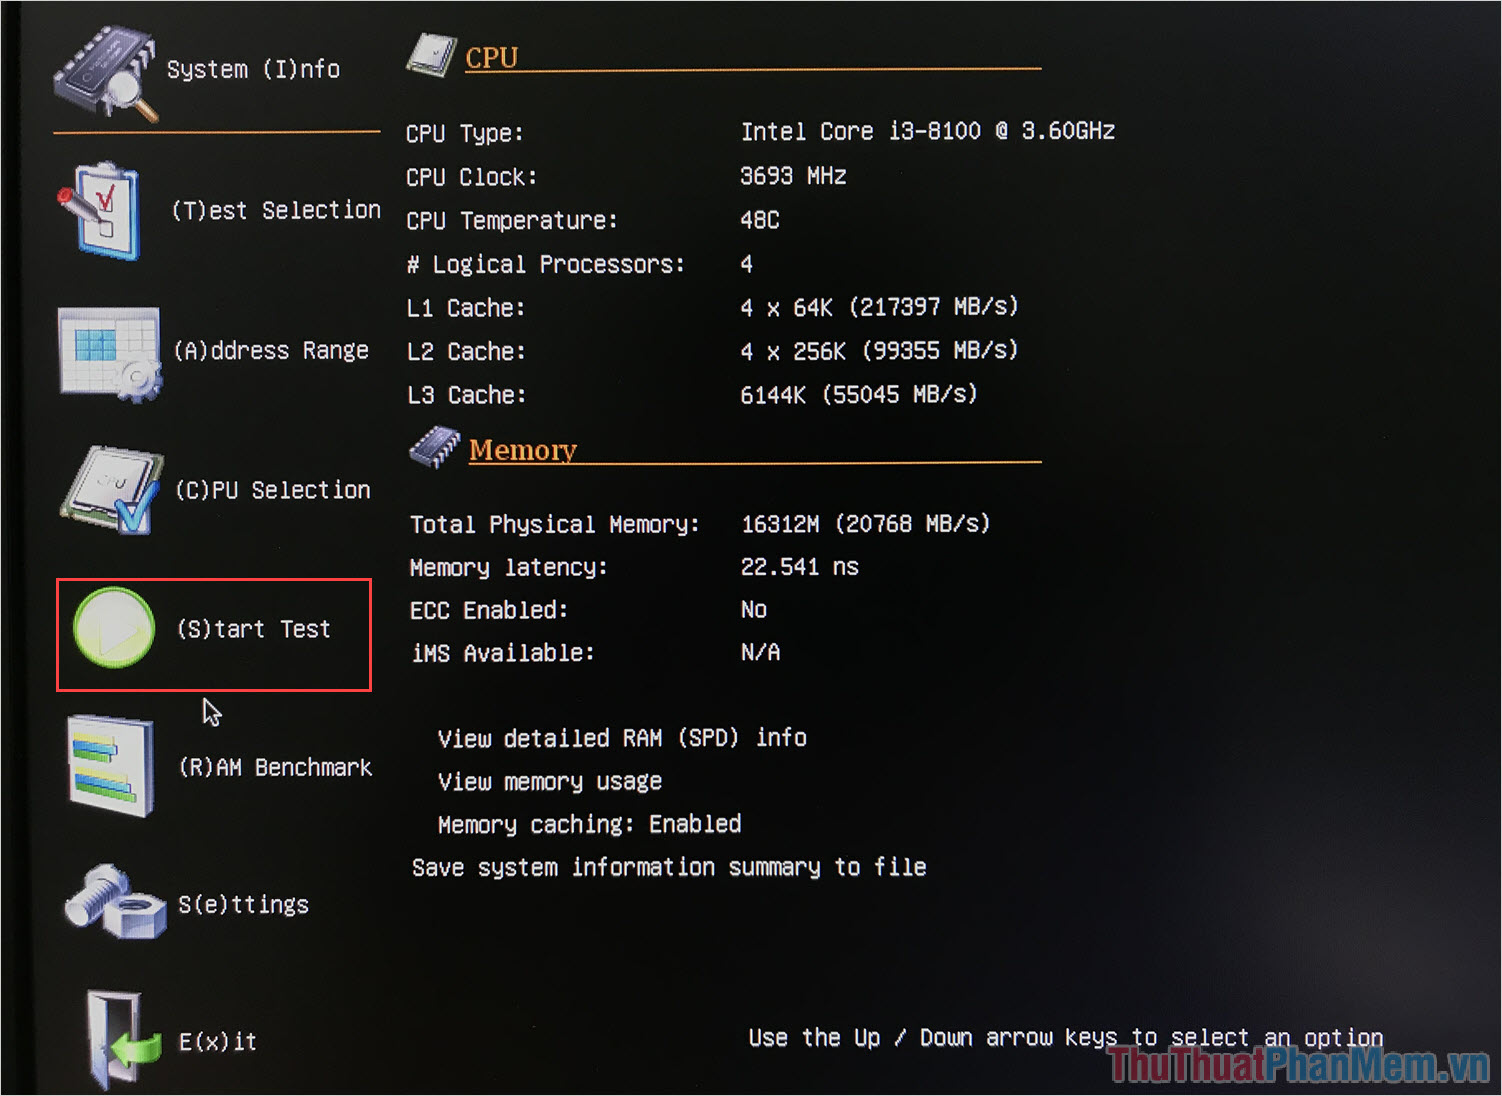
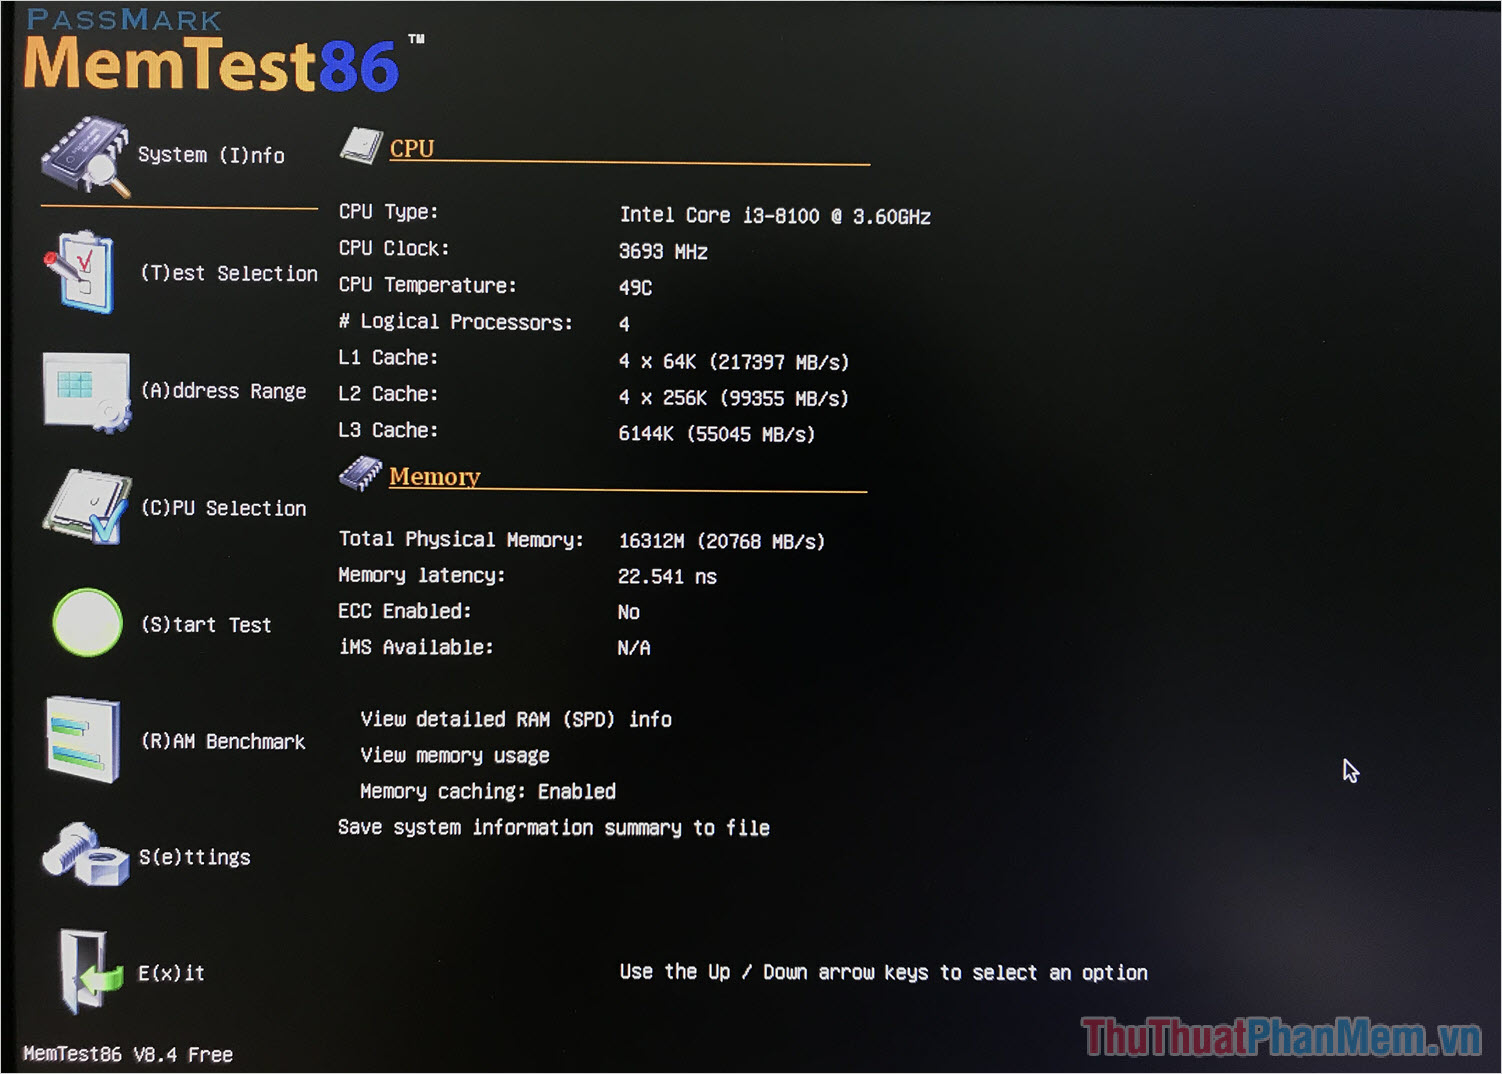
Step 1: On the main interface of your computer, select the Config option to access all MemTest86 settings.

Step 2: Next, locate the Start Test (shortcut key S) option to initiate the RAM testing process on your computer.
Step 3: The testing process typically lasts between 20 to 30 minutes, depending mainly on the RAM capacity and speed of your system.
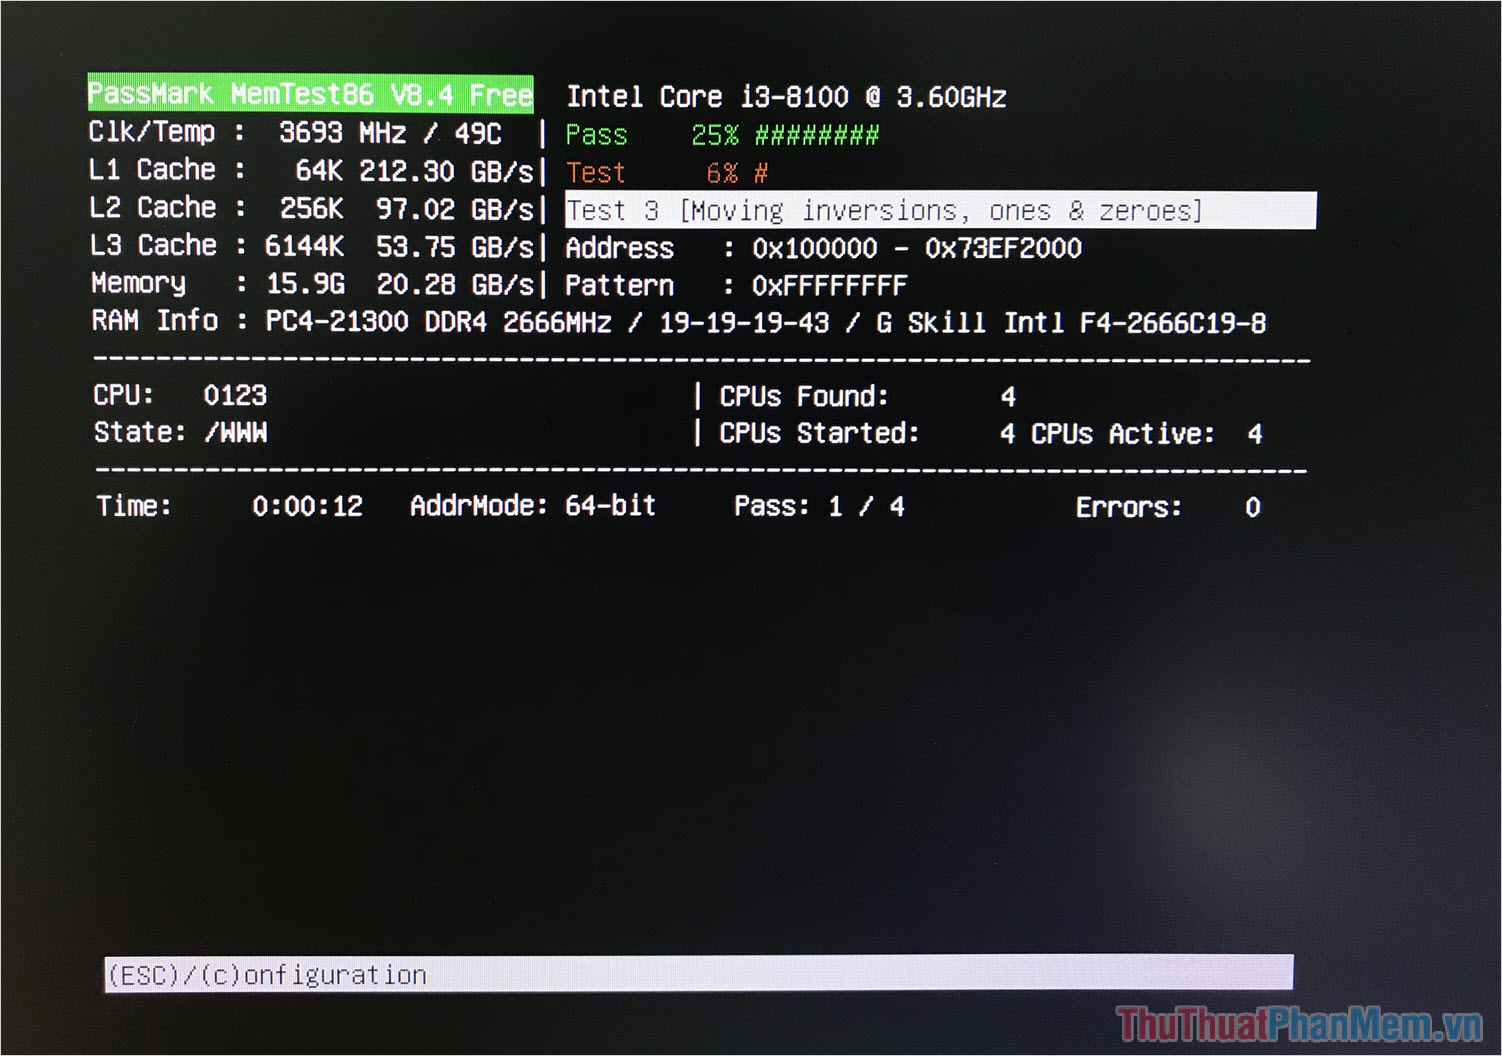
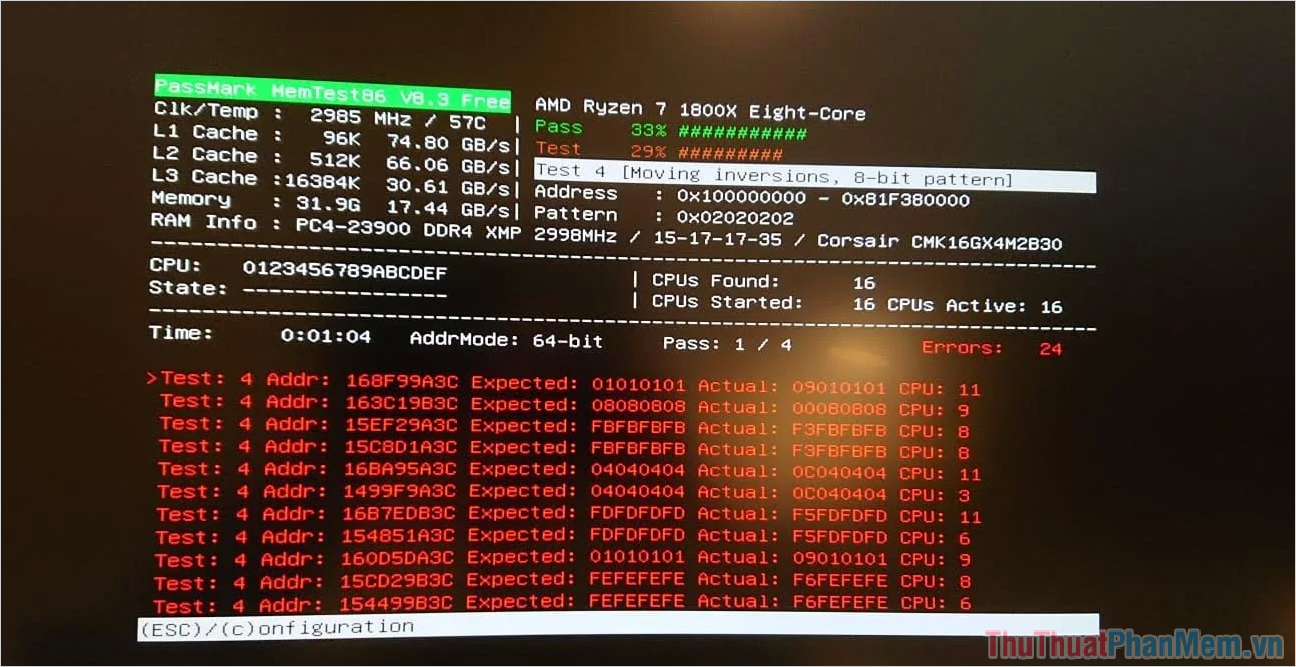
Step 4: During the Test process, two main scenarios may occur:
+ Computer encounters RAM errorsIf your computer encounters RAM errors, you'll receive a series of red alerts and red-highlighted command lines in the RAM check list, as shown in the image below.
 + Computer doesn't encounter RAM errors
If the computer doesn't encounter RAM errors, there won't be any red-colored command alerts, and the list won't contain any command lines either.
Additionally, you'll receive a notification 'Test complete, press any key to display summary', now press any key to exit.
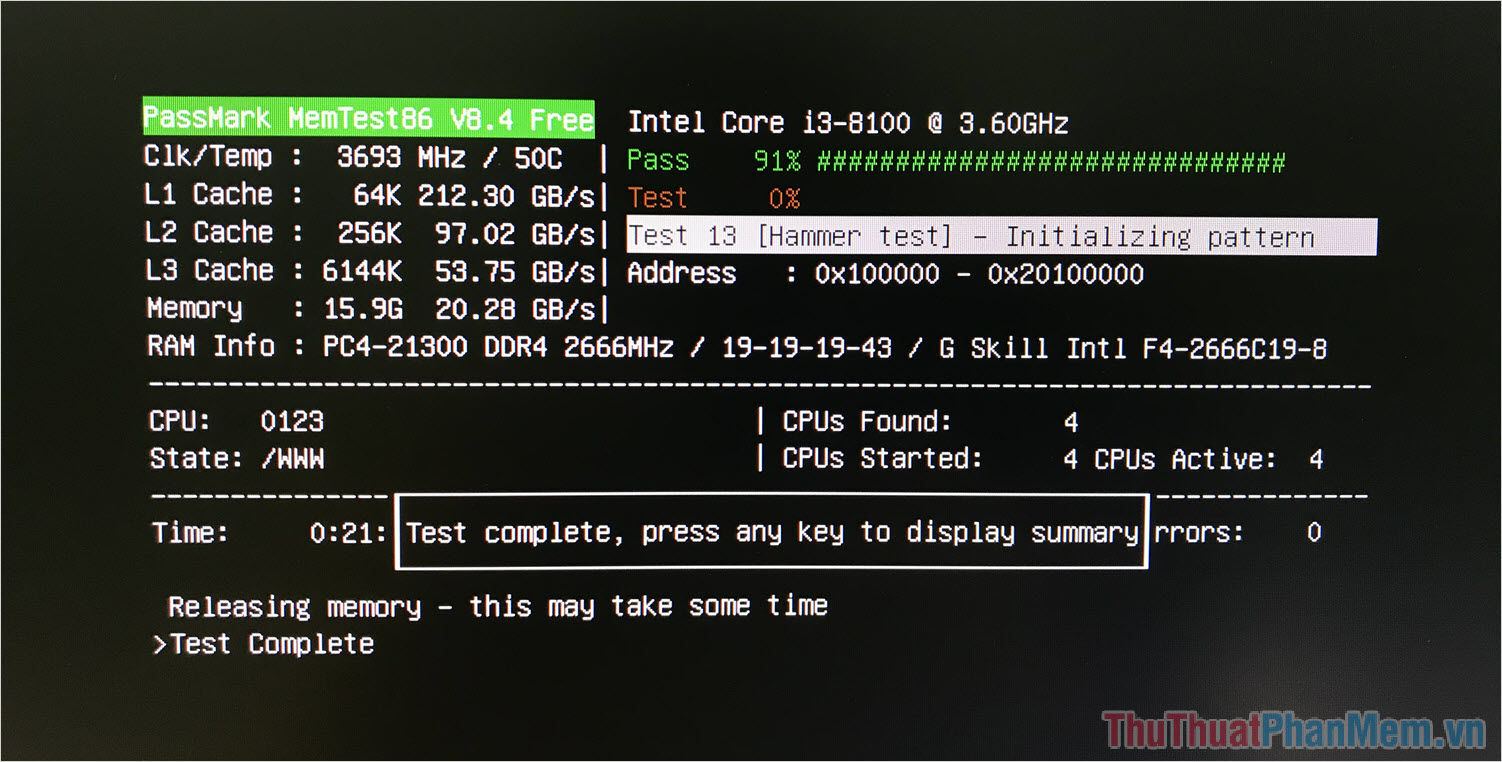
Step 5: On the main interface of MemTest86, select Exit (shortcut key X) to exit the RAM testing tool.
Step 6: Finally, restart the computer and press F2/ DEL to access the BIOS and change Boot Options back to default Windows settings as before.
This concludes the RAM testing process on your computer using MemTest86.
6. Resolving RAM Issues
In case you run MemTest86 to check your RAM and receive a series of error messages as illustrated above, it's best to replace the RAM module in your computer because there's no way to fix them. RAM is one of the most reliable components in a computer and rarely encounters errors, so cases of error reports are less than 10%.
In this article, Software Tricks has guided you on how to check RAM using the high-performance software MemTest86. Wishing you success!
