

The next character I wanted to write a few paragraphs resembling a guide for is “The Chaoswalker”. “The Chaoswalker” has to be unlocked by clearing a stage in Overlord mode cycle two before you can actually play him, but in my opinion this class is definitely worth the effort. At the start, you might be confused to how this guy is supposed to work with all those skills that display random damage values and inflict random negative effects to the opponent. All in all, “The Chaoswalker” is not exactly straight-forward in terms of how he deals damage and clears stages. However, with time invested into unlocking enough rune slots and skills, this guy can become an absolute machine and a solid example of how randomness can be handled in a “Survivors” game. Let me introduce you to a class that will make you love long rows of circles below opposing health bars.
Disclaimer: This “guide” is not meant as the only way to play the character described below. “Soulstone Survivors” is a highly complex game, which makes experimentation a vital part of the game and adapting to given scenarios a likely possibility. I am only providing builds to play with that I found particularly successful and only made this guide to put some information on the internet that is not simply content farms copy-pasting the same five paragraphs. I invite anyone who reads this article to give their own input in form of build orders, strategies, or even just anecdotes from past runs, all of which can be used to improve this text to help newer players.
Character Overview:
Stat Changes:
Playing “The Chaoswalker” will apply the following stat changes:
- -20 maximum health
- +10% critical damage chance
- +20% damage modifier
- -10 extra health per crystal
- +20% area modifier
As you can see above, “The Chaoswalker” gives up survivability for more … everything that improves his skills really. We can soften the blow of healing for 10 points less per crystal with level-ups while one uncommon health passive will annul the -20 maximum health. What we gain from the list above is definitely more valuable though: More damage, crit chance and area modifier means that we are set up for more damage dealing and clear speed. Fortunately, “The Chaoswalker” happens to be rather flexible in his level-ups due to negative effects-spreading taking priority over flat damage dealing, which allows us to skill into survivability if necessary without losing too much fighting power.
Unique Skills:
“The Chaoswalker” gains three unique skills for playing and gaining prestige levels, just as any other character in the game. The options you unlock are as follows:
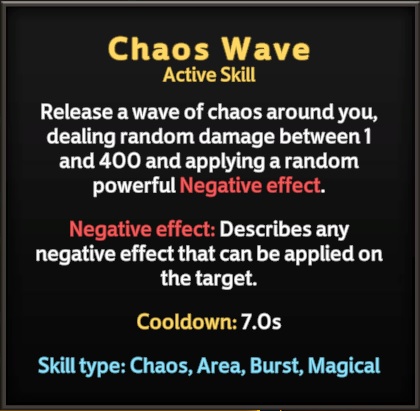
“Chaos Wave” is automatically unlocked once you reach prestige level 5 with “The Chaoswalker”. A big shockwave with solid damage and the usual negative effect application that (almost) all Chaos skills come with.

“Chaos Totem” is unlocked at prestige level 20. Definitely not a bad skill to work with, but requires some specific builds to work to the full potential since multi-cast and cast frequency are pretty much lost on this skill.

“Manifestations of Chaos” is finally unlocked at prestige level 50, spawning orbs that stay around and apply their damage to anything enemy-like they come in contact with.
Skill Types:
“The Chaoswalker” has access to the following skill types:
- Arcane
- Chaos
- Ice
- Fire
- Electric
- Shadow
- Holy
If you played “Soulstone Survivors” for a while, you will notice something upon looking at the short list above: “The Chaoswalker” has access to the buffing trinity in form of “Bloodlust”, “Arcane Power”, and “Might”, which is an amazing start. On top of that, Holy has some of the highest damaging skills in the game, while the entire array of skills gives a solid mix of negative effects that “The Chaoswalker” can apply and work with. Fire was one of the weaker options for the longest time but has seen an overhaul that transformed it into a solid aggressive skill type and while you would need to cheat summons from “The Necromancer” into the build via runes since they are unique skills, “The Chaoswalker” has access to at least some minions in form of “Chaos Golem” and “Frenzied Bunnies”.
In case you want to go particularly crazy: I have read somewhere that someone used the rune “Skill Mastery: Swing” to add “Scent of Blood” to their pool of skills, and while that seems highly random and is something I have not tried I can only imagine it being crazy once you get the ball rolling since the sheer amount of Negative effects stacked on the opponent will automatically bring tons of Bleed and Hemorrhage to work with.
Weapons:

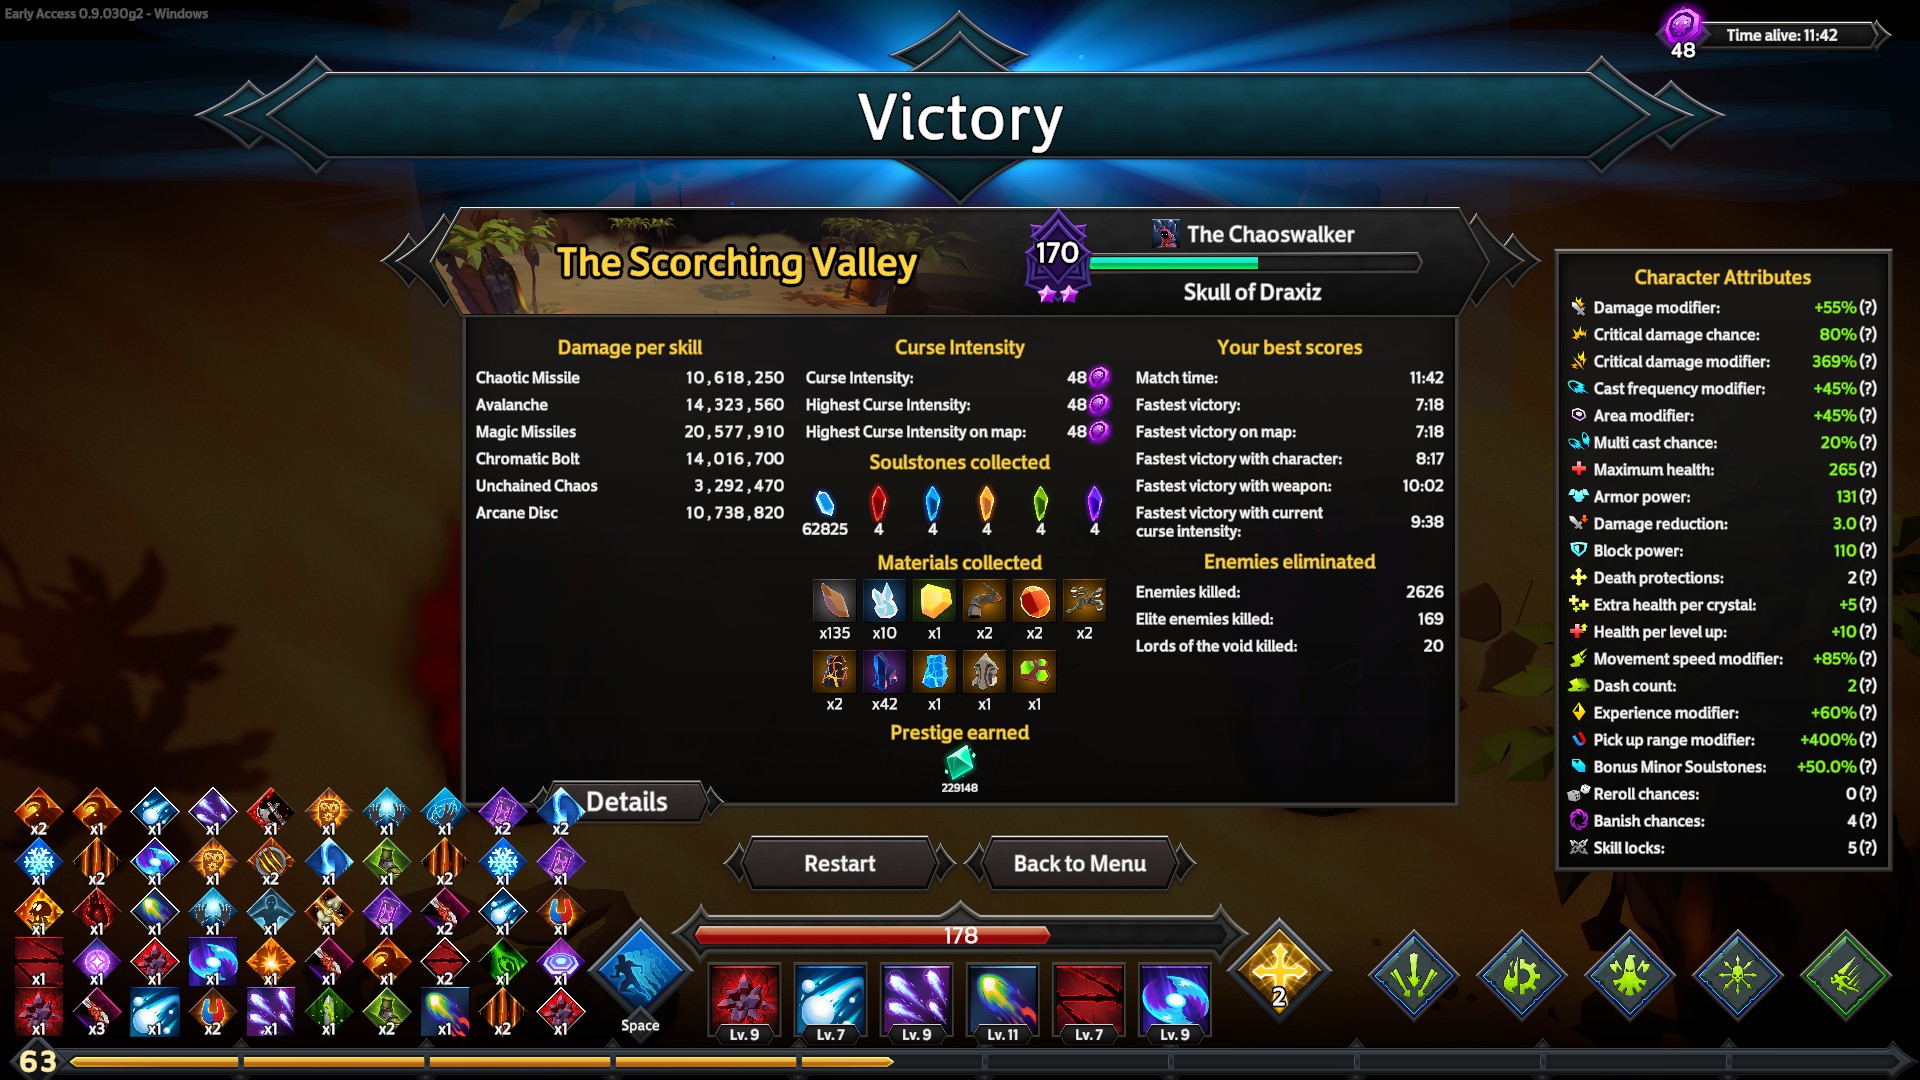
- Skull of Draxiz: No stat changes, “Chaotic Missile” as starting skill, with “Unchained Chaos” as secondary via “Weapon Expert”
“Skull of Draxiz” is the starting weapon of “The Chaoswalker” and a fine option to work with in all honesty. The starting skill, “Chaotic Missile”, can become a solid tool to work with once you accrued some multi-cast chance and the fact that it can return to you means that enemies often get the damage and the negative effects twice; which in case of the negative effects means that it can trigger the long snowball chains of effects twice, making this skill even sweeter. All in all, a good choice to go with, although I personally find the early stages of the game to be a particular weakspot, which makes the rune “Weapon Expert” to gain “Unchained Chaos” as an additional skill a must-have in my opinion.

- Artifact of Corruption: +15% critical damage modifier, – 5% damage modifier, +5% cast frequency modifier, -10% area modifier, “Seeking Chaos” as starting skill, with “Area of Chaos” as secondary via “Weapon Expert”
“Artifact of Corruption” is the second weapon of “The Chaoswalker” and one that you first need to unlock buy crafting it in the Blacksmith menu. I am pretty sure that there are enough people discarding this option right away since the internet seems to united in the idea that “Chaotic Missile” is one of the best skills in the game (apart from the group of people that thinks “The Chaoswalker” is trash in the first place). However, “Artifact of Corruption” is quite solid since it adds more stats right from the start, which make the total stat gain look like this:
- -20 maximum health
- +10% critical damage chance
- +15% critical damage modifier
- +15% damage modifier
- +5% cast frequency modifier
- -10 extra health per crystal
- +10% area modifier
On top of that, you gain “Seeking Chaos” as your starting skill, which is not necessarily a skill that you always want to keep into the finishing stages of your build, but a solid skill to carry you through the otherwise lack-luster early game.

- Flamewalker’s Spire: +10% critical damage chance, +20% damage modifier, -15 armor power, +15% multi cast chance, “Orbs of Destruction” as starting skill, with “Volcano Eruption” as a secondary via “Weapon Expert”
With the “Scorching Sands” update, “The Chaoswalker” gained a third weapon to work with. It grants a Fire skill, which I am not so hype about since there various better skill types in the game, but at least it can already apply melting to increase your damage output overall. Talking about damage, “Flamewalker’s Spire” goes full-on glass cannon which you can see with the combined stats below:
- +20% critical damage chance
- +40% damage modifier
- +15% multi cast chance
- +20% area modifier
- -20 maximum health
- -15 armor power
- -10 extra health per crystal
A solid increase in damage paired with more crit chance, more area, and more multi cast is quite impressive; and bought by dropping the defensive capabilities of “The Chaoswalker” into dangerous territory. It is perfectly possible to use “Flamewalker’s Spire” for the bonuses alone if you are not interested in a particular starting skill since it provides solid bonuses that work well with the class.
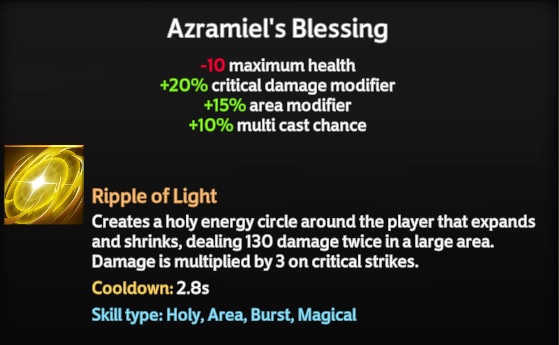
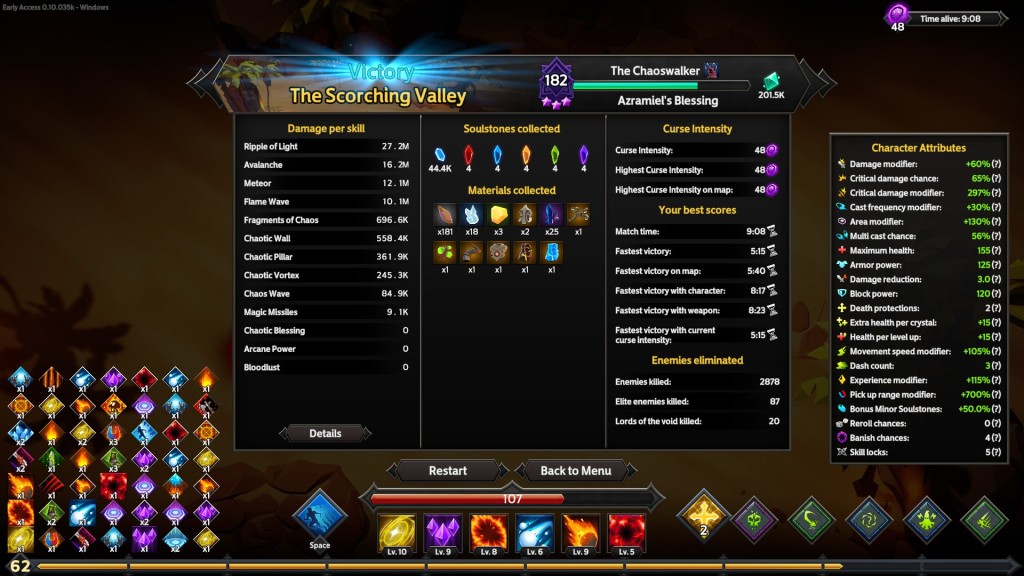
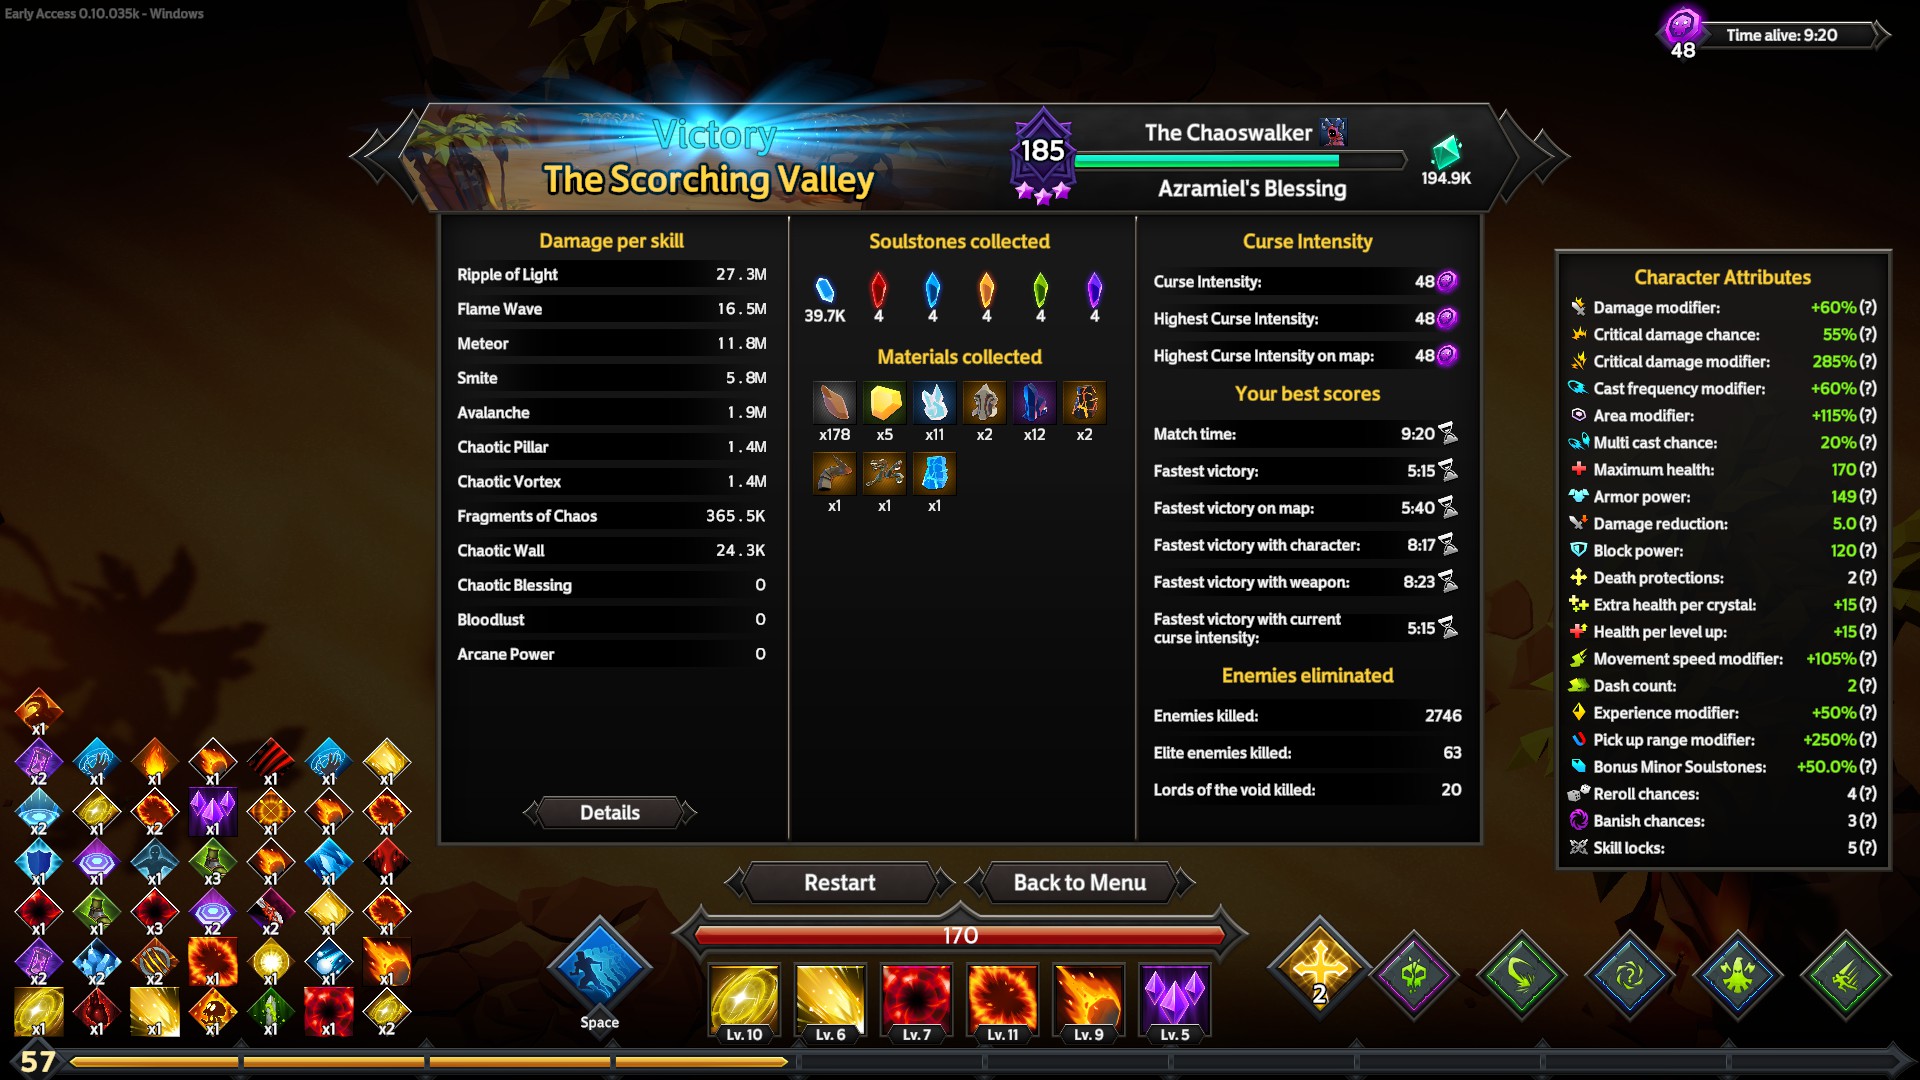
- Azramiel’s Blessing: -10 maximum health, +20% critical damage modifier, +15% area modifier, +10% multi cast change, “Ripple of Light” as starting skill, with “Sanctified Orb” as secondary via “Weapon Expert”
The fourth weapon of “The Chaoswalker” came with the major update for the other half of the cast at that time, the “Frostborn Wrath” update. Featuring a rather odd choice for “The Chaoswalker”, the weapon “Azramiel’s Blessing” works with Holy skills. But let me tell you that only the fact that a dark-red mage shoots holy light is odd, since the synergy with status ailments such as Dazed and Disoriented is definitely there. But first, let us sum up what “Azramiel’s Blessing” actually does with the stats of “The Chaoswalker”:
- +10% critical damage chance
- +20% critical damage modifier
- +20% damage modifier
- +10% multi cast change
- +35% area modifier
- -10 extra health per crystal
- -30 maximum health
It was to be expected that “Azramiel’s Blessing” would not make “The Chaoswalker” any tankier than usual, with -30 maximum health being noticeable but not backbreaking while the -10 extra health per crystal is kinda of nullfied by the fact that the skill tree of “The Chaoswalker” features a skill that gives up to 5 health on level up. For that, you gain more damage all around, a huge boost to your area modifer (which scales amazingly with the starting skill “Ripple of Light”), and bonus multi cast change. All this allows the class to provide the same aggressive power as usual but with the twist that you can now use a Holy skill to do the work for you since “Ripple of Light” is absolutely amzing with the bonus chance to inflict Negative effects and the “Overwhelming Chaos” rune to randomize the damage. The weapon is not strictly better than previous options, but it works well with the right builds and adds another feather to this classes’ cap.
Class-specific skills

The “Frostborn Wrath” update gave the last seven classes their much needed updates in form of the character-specific skill trees and unique passives, which means that “The Chaoswalker”, a class that was already very much playable before the update got a huge number of quality of life-improvements. The leveling of the character-specific skill tree is the same for this class as for all the otheres: You unlock the skill tree on character level 20 and each level after that will give you one point to invest into the skill tree, with a total of 150 skill points being needed to complete it. All characters have four important nodes I will go over first whilst the table further down below lists all the other bonuses and their costs.
15000 Minor Soulstones: Altar of Chaos
This is actually a weird one since it does not explain what it does in detail anywhere in the game. However, the gist of “Altar of Chaos” is as follows: Whenever “The Chaoswalker” kills an enemy, there is a chance that said enemy will drop chaos energy. Your display has a gauge with four compartments that you can fill and four slot for eyes above it to show you whether there are bonuses active and how many you are currently profiting from. Once you filled a part of the gauge you can go to one of the altars of chaos on the map and stand near it to fill a bar which upon being filled completely will give you onerandom dark blessing, which take form of skills you temporarily gain access to. The once I have seen so far are “Chaotic Pillar” (which seems to be a Chaos version of “Smite”), “Chaotic Vortex” (which seems to be a Chaos version of “Void”), “Chaotic Wall” (which seems to be a Chaos version of “Fire Wall”), “Fragments of Chaos” (which seems to be a Chaos version of “Unholy Bolt”), and “Chaotic Blessing”, a buff spell.
In my opinion, this is one of the less flashy passives in the game, but definitely not a bad one. What you need to understand is that every activation of a dark blessing temporarily gives you one additional skill, which for me means that I normally stack them until I can go ham, try to gain three to four dark blessing when the bosses spawn and become a death star for around fifteen seconds. You can go for single blessings aswell, but those do too little to matter in my opinion so I rather go for the burst of power two to three times per area.
30000 Minor Soulstones: Gambler
Unlocks the “Gambler” rune, which costs zero Rune Points and increases your damage by 10%, but your active skills are chosen randomly and cannot be changed.
60000 Minor Soulstones: Misfortune’s Embrace
Unlocks the “Misfortune’s Embrace” rune, which costs two Rune Points and give all your skills a 20% chance of applying a random powerful Negative effect.
10 Violet Soulstones: Overwhelming Chaos
Unlocks the “Overwhelming Chaos” rune, which costs one Rune Point and changes the direct damage of all your skills to a random damage range from 1% to 250% of the original damage of that skill. This effect does not apply to skills that already apply their damage via damage range, i.e. most Chaos skills. The effect also does not apply to negative effects.
| Effect | cost |
|---|---|
| Increases your area modifier by an additional 1%/2%/3%/4%/5%. | – 1000 Minor Soulstones – 2000 Minor Soulstones – 4000 Minor Soulstones – 8000 Minor Soulstones – 1 Blue Soulstone |
| Increases the chance that enemies drop chaos energy by 1%/2%/3%/4%/5%. | – 2400 Minor Soulstones – 4800 Minor Soulstones – 9600 Minor Soulstones – 1 Blue Soulstone – 2 Green Soulstones |
| Increases the area modifier of your dark blessings by 1%/2%/3%/4%/5%. | – 2500 Minor Soulstones – 5000 Minor Soulstones – 10000 Minor Soulstones – 1 Red Soulstone – 2 Yellow Soulstone |
| Increases the potency of your dark blessings by 1%/2%/3%/4%/5%. | – 2300 Minor Soulstones – 4600 Minor Soulstones – 9200 Minor Soulstones – 1 Yellow Soulstone – 1 Violet Soulstone |
| All skills now have a 1.5%/3%/4.5%/6%/7.5% chance to apply a random powerful Negative Effect on targets they hit. | – 1100 Minor Soulstones – 2200 Minor Soulstones – 4400 Minor Soulstones – 8800 Minors Soulstones – 1 Red Soulstone |
| Increases your multi cast modifier by an additional 2%/4%/6%/8%/10%. | – 1250 Minor Soulstones – 2500 Minor Soulstones – 5000 Minor Soulstones – 10000 Minor Soulstones – 3 Yellow Soulstones |
| Increases your critical damage modifier by an additional 5%/10%/15%/20%/25% while your health is below 30%. | – 1100 Minor Soulstones – 2200 Minor Soulstones – 4400 Minor Soulstones – 2 Red Soulstones – 3 Blue Soulstones |
| Reduces the amount of chaos energy required to receive a dark blessing by 1%/2%/3%/4%/5%. | – 2300 Minor Soulstones – 4600 Minor Soulstones – 9200 Minor Soulstones – 2 Blue Soulstones – 2 Violet Soulstones |
| Increases your damage modifier by an additional 2%/4%/6%/8%/10%. | – 1100 Minor Soulstones – 2200 Minor Soulstones – 4400 Minor Soulstones – 8800 Minor Soulstones – 3 Red Soulstones |
| Increases your cast frequency modifier by an additional 1%/2%/3%/4%/5%. | – 1200 Minor Soulstones – 2400 Minor Soulstones – 4800 Minor Soulstones – 9600 Minor Soulstones – 2 Yellow Soulstones |
| Increases the cast frequency of your dark blessings by 2%/4%/6%/8%/10%. | – 2000 Minor Soulstones – 4000 Minor Soulstones – 8000 Minor Soulstones – 2 Yellow Soulstones – 3 Green Soulstones |
| Increases your critical damage chance by an additional 1%/2%/3%/4%/5%. (This effect is applied to all of your characters.) | – 2100 Minor Soulstones – 4200 Minor Soulstones – 8400 Minor Soulstones – 2 Violet Soulstones – 3 Blue Soulstones |
| Reduces the amount of chaos energy required to receive a dark blessing by 1%/2%/3%/4%/5%. | – 3100 Minor Soulstones – 6200 Minor Soulstones – 12400 Minor Soulstones – 3 Blue Soulstones – 4 Red Soulstones |
| Increases the potency of your dark blessings by 2%/4%/6%/8%/10%. | – 3000 Minor Soulstones – 6000 Minor Soulstones – 12000 Minor Soulstones – 3 Yellow Soulstones – 4 Green Soulstones |
| Increases the damage modifier of all your skills of type Chaos by 2%/4%/6%/8%/10%. (This effect is applied to all of your characters.) | – 2800 Minor Soulstones – 5600 Minor Soulstones – 11200 Minor Soulstones – 3 Green Soulstones – 3 Violet Soulstones |
| Increases your movement speed modifier by an additional 2%/4%/6%/8%/10%. | – 2100 Minor Soulstones – 4200 Minor Soulstones – 8400 Minor Soulstones – 16800 Minor Soulstones – 3 Green Soulstones |
| Increases the critical chance against enemies with more than 85% health by 2%/4%/6%/8%/10%. | – 2000 Minor Soulstones – 4000 Minor Soulstones – 8000 Minor Soulstones – 3 Red Soulstones – 4 Blue Soulstones |
| Increases maximum health by 3/6/9/12/15. | – 2150 Minor Soulstones – 4300 Minor Soulstones – 8600 Minor Soulstones – 17200 Minor Soulstones – 3 Yellow Soulstones |
| You recover up to 1/2/3/4/5 health points every time you level up. | – 2100 Minor Soulstones – 4200 Minor Soulstones – 8400 Minor Soulstones – 16800 Minor Soulstones – 4 Blue Soulstones |
| Increases your experience modifier by an additional 3%/6%/9%/12%/15%. | – 1900 Minor Soulstones – 3800 Minor Soulstones – 7600 Minor Soulstones – 15200 Minor Soulstones – 4 Red Soulstones |
| Increases your area modifier by an additional 2%/4%/6%/8%/10%. | – 4000 Minor Soulstones – 8000 Minor Soulstones – 16000 Minor Soulstones – 32000 Minor Soulstones – 5 Red Soulstones |
| Increases your critical damage chance by an additional 1%/2%/3%/4%/5%. | – 4200 Minor Soulstones – 8400 Minor Soulstones – 16800 Minor Soulstones – 33600 Minor Soulstones – 5 Green Soulstones |
| Increases your area modifier by an additional 2%/4%/6%/8%/10% while your health is above 90%. | – 5600 Minor Soulstones – 11200 Minor Soulstones – 22400 Minor Soulstones – 4 Blue Soulstones – 5 Yellow Soulstones |
| Increases your pick up range modifier by an additional 10%/20%/30%40%/50%. | – 3800 Minor Soulstones – 7600 Minor Soulstones – 15200 Minor Soulstones – 30400 Minor Soulstones – 4 Blue Soulstones |
| Increases your critical damage modifier by an additional 5%/10%/15%/20%/25%/30%. | – 4100 Minor Soulstones – 8200 Minor Soulstones – 16400 Minor Soulstones – 32800 Minor Soulstones – 4 Yellow Soulstones – 5 Green Soulstones |
| Increases the duration of the dark blessings received by 3%/6%/9%/12%/15%. | – 5400 Minor Soulstones – 10800 Minor Soulstones – 21600 Minor Soulstones – 4 Red Soulstones – 4 Violet Soulstones |
| Increases your area modifier by an additional 1%/2%/3%/4%/5%. (This effect is applied to all of your characters.) | – 6000 Minor Soulstones – 12000 Minor Soulstones – 24000 Minor Soulstones – 48000 Minor Soulstones – 5 Red Soulstones |
| Increases the chance enemies will drop chaos energy by 1%/2%/3%/4%/5%. | – 5300 Minor Soulstones – 10600 Minor Soulstones – 21200 Minor Soulstones – 4 Yellow Soulstones – 5 Green Soulstones |
| Increases your cast frequency modifier by an additional 2%/4%/6%/8%/10%. | – 3850 Minor Soulstones – 7700 Minor Soulstones – 15400 Minor Soulstones – 30800 Minor Soulstones – 5 Blue Soulstones |
Example Builds:
I have a number of ideas for builds regarding “The Chaoswalker”, but at the very core you pretty much always want to increase a few specific stats via passives to get the most out of your class choice. Here are a few stats that you should pretty much always go for, regardless of which of the builds down below you want to use.
- Cast frequency: The faster you can cast spells, the more random effects will be applied on the opponent while the damage and clear speed obviously increase aswell. Cast frequency is an absolute must-have on “The Chaoswalker”.
- Multi-cast chance: Casting the spells more often will apply more effects and further increase your damage output. This is especially true if you are already using skills that hit multiple times by design, such as “Chaotic Missile” or “Ripple of Light”.
- Area modifier: While not all skills that I will introduce over the course of this guide profit massively from increasing their area of effect, there are plenty of skills that make use of it. “Chaos Wave”, “Death Claw”, and “Ripple of Light” are just three examples that really appreciate the upgrade to size, both eventually taking care of enemies that are not even close to you anymore. Also, increased size means more targets to apply Negative effects against, which obviously supports the build further.
- Critical chance: While critical change obviously increases your damage output and therefore improves your build with faster clear speed, there are more reasons to level this stat on “The Chaoswalker”. Since you should go for all the status effects you can put on the enemy, there are both “Brutal Strikes” to give Bleed stacks with a 50% chance on critical hit aswell as the actually far more important “Expose Weaknesses” with will give Wound as a status effect to the struck opponent with a 100% chance if the hit was critical. Since we do stack all those effects in massive numbers having an effect that doubles every status ailment is completely insane. Also, any damaging ailments seem to apply crits aswell when caused by a critical hit, which results in more stacks of the ailment being applied.
- On-Hit effects: Most “Chaoswalker” builds push out a lot of damage zones which all apply random negative effects against hit enemies on their own but can definitely increase their efficiency further with additional trigger chances. If you have nothing better to level during the selection screen, I would always opt to go for any of the on-hit passives, which are “Spontaneous Combustion” for Burn, “Venomous” for Poison, “Fateful Strikes” for Doom, “Touch of Ice” for Slow, “Frailty” for Fragility, as well as the combo effects like “Impending Doom”, “Desperation”, “Thermal Shock”, “Hypothermia”, “Gangrene”, “Poisonous Blood”, and “Debilitating Plague”. My preference is to have one each of the basic skills, using synergy skills that I can see working in the current scenario, and with the only one that I opt to get more than one of being “Frailty”.
With that out of the way, here are some ideas for builds for “The Chaoswalker” that worked for me on Curse Level 48:
The Chaos AOE build:

As the first build that I want to introduce for “The Chaoswalker”, I have something that is as close to the phrase “as intended” as possible. Focussing mostly on Chaos skills, you can unleash devastating skills that are not that impressive on their own but draw their strength from the long rows of status ailments that your opponents will suffer from. So, let us get started: The starting weapon for the Chaos build is definitely “Artifact of Corruption”, which not only provides the more useful starting skill since “Seeking Chaos” is more reliable in terms of damage output than “Chaotic Missile”, but it also increases the stats even further which helps us ramp up to the powerful stages quicker.
- “The Chaoswalker” wants multi-cast as much as most of the other characters in this game, so it is only reasonable to give him the buff spell “Arcane Power” that increases the multi-cast modifier by a sizeable margin. If you have played “Soulstone Survivors” for a while chances are that you understand how broken this spell is; and since “The Chaoswalker” has access to Arcane in his seven skill types we can easily obtain that spell.
- “Bloodlust” is another buff spell and another ability that you should know the value of after playing a few rounds of “Soulstone Survivors”. The movement speed buff is nice to have but rather trivial since we take this skill for the cast frequency bonus. You do not necessarily need “Bloodlust” to make this build work, but at the start you will notice some sizeable gaps in your damage output that can be worked around with “Bloodlust” while keeping it in the final setup causes high-speed spell-flinging of doom.
- “Chaos Wave” is a solid option to go with, providing a big AOE with good damage and random negative effects for anything in its wake. At the end of the build, “Chaos Wave” grows into a screen-wide damage zone that showers everything with negative effects, while providing a good clearing option for the earlier parts of the round.
- “Death Claw” might start as a randomly spawning and overall unreliable skill, but it scales beautifully with area modifying and comes with massive base damage. Also, this skill hits anything in its area which means that it will make-up for spawning under random enemies by clearing all opponents in a sizeable portion of the screen anyway. It also happens to be deadly against bosses with enough multi-cast.
- The Prestige 50 skill of “The Chaoswalker”, “Manifestations of Chaos”, does seem underwhelming at first, but while small and randomly moving projectiles do not seem that crazy, they will stay in the area after getting in contact with the enemy. This means that you can flood an area with “Manifestations of Chaos” with multi-cast, giving damage and tons of negative effects to basically any enemy to walks towards you, making them an odd but still vital part of the build.
- “Seeking Chaos” is basically “Arcane Missiles” as a Chaos Spell. By using “Artifact of Corruption” as your starting weapon you will automatically have this skill equipped at the start, which is fine since it does a decent job clearing the first few enemies while becoming a fast way to stack more negative effects onto the opponent with some upgrades to multi-cast and cast frequency.
- An optional choice comes with “Area of Chaos”, which is basically “Chaos Wake” with less damage and effect since “Area of Chaos” does not even get close to the silliness of “Chaos Wake” with upgrades to multi-cast and cast frequency. It is still an option, and it is the secondary skill with “Artifact of Corruption” with the rune “Weapon Expert”, but the skills listed above provide overall more damage and effect spreading.
- One thing that “The Chaoswalker” cannot provide is tons of summon skills; but that does not mean that he cannot have some minions pull the aggro for him. Cue “Chaos Golem”, which will draw the enemies’ attention, meaning less stuff to dodge for you, and with a starting damage range between 1 and 2000 they are the hardest-hitting Chaos spell in the game at the current moment, something the Chaos build can make use of when picking the rune “Controlled Chaos” for two damage rolls.
- A rather unchaotic option to go with is “Magic Missiles”, which is a cool skill to go for in terms of damage since it applies Brittle, will scale insanely well with multi-cast, and supports the idea of the build that you will end up with 100% critical hit chance due to increased damage Also, since it hits thirty times per activation, you really get some leverage out of passive skills applying Negative effects.
Assembling this skill set can be tricky since it uses nothing from five of the seven skill trees available to the character, meaning you will encounter Ice, Fire, Electric, Shadow, and Holy skills you do not really need, but you can opt to pick any skills with large AOEs as filler until you get what you need. Also, the fact that “The Chaoswalker” has Holy in his skill set means that you can opt to go with “Might” as another buff spell, although I found it to be superfluous in the finished build. But in the end, the passives are the glue that keeps everything together so just prioritise what I have listed at the top of this section. Once everything is working, you really do not need to aim anymore. Simply walking around and dodging red areas will be enough since your active skills together with the combination passives will pile up so much damage (via Bleed, Poison, Hemorrhage, Rot, Doom, Cursed), slows, and debuffs that will further increase any damage. The last piece of the puzzle is the Rune system, with the following two options working best for this build in my opinion (and yes, in this case the old runes still work the best in my opinion):
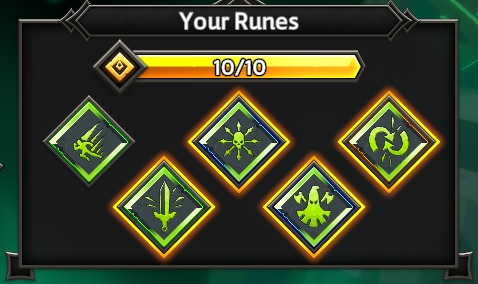
“Dash” for 50% longer dashes and therefore more mobility, “Weapon Expert” for a secondary starting skill to increase early game clearing, “Controlled Chaos” to increase the damage of your Chaos skills, “Executioner” for massive damage bonuses due to the number of negative effects you are distributing, and “Synergetic” to get combo effects easier and have the trigger chance improved by 25%. (Rune Cost: 10)

“Dash” for 50% longer dashes and therefore more mobility, “Controlled Chaos” to increase the damage of your Chaos skills, “Executioner” for massive damage bonuses due to the number of negative effects you are distributing, “Generalist” as another damage bonus small damage bonus, and “Multi-Cast Mastery” for more instances of your spells. (Rune Cost: 9)
With four to five skills from the Chaos tree, it will be fairly likely that you can get upgrades for Chaos-type spells rather than for just single abilities, which provide more bonuses and are therefore better than the single upgrade ones. In addition to that, “Chaos Wave”; “Death Claw”, “Manifestations of Chaos”, and “Seeking Chaos” not only all Chaos skills, but also happen to be “Burst”, which is also something that might appear as an upgrade option. With “Bloodlust” and “Arcane Power”, you have two “Empowering” and “Lasting” abilities to buff, while “Missile” also sometimes occurs due to “Manifestations of Chaos” and “Seeking Chaos” sharing that type. This build is decent for high curse runs, but absolutely excels in killing lots of monsters, for example if you want to farm the “500000 enemies killed”-achievement.
The Frontal Chaos build:


As I have already mentioned further up in this article, people seem to like “Chaotic Missile”. I personally do not mind either starting skill, but with so many redditors saying that “Chaotic Missile” could be one of the best skills in the game I had to try it out myself. And it turns out that the skill does but in some work: Instead of going with the wide areas of destruction in the build above, you can also go for a barebones but effective way to deal with most of the things the game throws your way. Needless to say, if we want “Chaotic Missile” as our starting skill we need to pick “Skull of Draxiz”, but it is also perfectly possible to use “Flamewalker’s Spire”. Regardless of what weapon we start with, we will support it with the following additions:
- Obviously multi-cast is a solid choice to go with in this build, but I would say that it is not always necessary. So, go with “Arcane Power” if you can afford to lose one of the other options, but the skill set above should do fine with only multi-cast chance from passives.
- “Bloodlust” allows us to fire off skills more quickly, which means more damage and negative effects for whatever happens to stand in front of us. More cast frequency is good in most scenarios and our summoned “Chaos Golems” will appreciate more attack speed.
- I have only listed “Chaos Golem” as an optional skill in the build above, but with less damage in wide areas and more targeting required it only makes sense to impliment them into the build whenever possible. “Chaos Golems” hit like a truck, especially with “Controlled Chaos” making harder hits more likely, and will draw aggro to give you the opportunity of killing the opposition in peace.
- “Chaotic Missile”, the starting skill, comes with rather slow damage output but the opportunity to do things twice. Combined with the other skills “Chaotic Missile” turns into a solid pillar to build upon, with lots of projectiles going back and forth when multi-cast is increased while also trigger negative effects like crazy.
- The smaller and more targeted cousin of “Chaotic Missile”, “Chromatic Bolt” does not need to hide in this build, as it can potentially turn into a deadly option on its own. It will also spread negative effects, allowing for more of the effect synergies to trigger, while making the rune “Generalist” worth taking since it has so many different skill types.
- “Light Beam” has been one the most broken skills in the game for the longest time and a fine addition to this build. “Light Beam” stacks Brittle like crazy which will turn any damage into massive amounts after a short while. And since it basically fires in the same direction as “Chaotic Missile”, meaning forwards, you do not even need any fancy targeting; just point at the opponent you wish gone and “Light Beam” will help to make your problem go away.
- More Brittle means more damage, which is why “Magic Missiles” is a solid choice for this build. You could technically also use multiple “Light Beams”, but we do not have the rune points for that and “Magic Missiles” is a fine option to spread the ailment in a larger area.
- “Orbs of Destruction”, the starting skill if you choose to use “Flamewalker’s Spire”, might not be as good as “Chaotic Missile”, but the skill will still apply both Burn and Melting without any outside help, only being kept back by randomly spawning one to five projectiles.
- Since you get the skill via “Weapon Expert” anyway, you might aswell keep “Unchained Chaos”. The chaos lightning will help in terms of damage spread without requiring area enhancements, but I normally trade it for other skills.
This is another build that ignores quite a number of skill types at our disposal, although we technically feature them via “Chromatic Bolt”. Weirdly, “Chromatic Bolt” will make passives like “Area of Effect: Fire” (to name just one example) appear even though it would be the only skill to gain from that pick and the buffs sometimes being nonsensical, but I guess that is a small price to pay for the damage increase it provides. And if it picks Holy as the skill type to buff you also get to improve “Light Beam”, which is nice. But the Frontal-focussed build does not differ in active skills only, the passives are also slightly different due to certain interactions not functioning in this scenario. In general, the passives I have listed above still work, but I would definitely drop the area of effect increases since they do almost nothing and go for damage increases instead.
Obviously, since we are talking about “The Chaoswalker” here, you can still opt to level many different things and are not forced to laser-focus on only what I listed above. Any additional dashes and magnetism/experience gain passives can be picked as often as you consider necessary. You can still go for critical hit chance, and should you manage to get that high enough you can also opt to increase critical hit damage instead of only going for normal damage. If you need more health to survive or have no better options to select, there is nothing stopping you from going with that aswell. The beauty of playing “The Chaoswalker” is that you can go full damage, tanky, and anything in-between and still see some solid results. This seques us to the runes section, for which I have the following set to propose:

“Weapon Expert” to get “Unchained Chaos” for early-game clear and as a potential skill to keep, “Executioner” for massive amounts of bonus damage due to negative effect-spread, “Generalist” for “Chromatic Bolt” which alone will increase your %-damage by a ton, “Focus Fire” to further increase the damage while ignoring the AOE-shrink since most of your skills do not care about area size anyway (which you can easily switch for “Overwhelming Chaos” if you want), and “Controlled Chaos” to increase the potential base damage of your Chaos skills. (Rune Cost: 9)
If you are particularly crazy for a specific skill like “Chromatic Bolt”, it is probably possible to change the runes to include “Singular Focus”. However, you cannot do that with “Chaotic Missile” since it is a weapon skill and therefore not part of the skill choices you are given on level up (at least not without further commitment on Rune slots). But I feel like the setup above does its job pretty well. You will need the damage at the start and with the amount of negative effects and sizeable numbers of Brittle being stacked, any damage will help you clear elites and Lords of the Void that much faster. This is also why I would say that this build can take on high curse-level runs since you should be able to keep the big crazy opponents under control quite well.
The “Anything but Chaos”-AOE build
With the fourth weapon option in form of “Azramiel’s Blessing” and the new runes via “The Chaoswalker’s” personal skill tree, there is no the option to completely omit using Chaos skills at all and use whatever else the class has available; and there are quite a few interesting tools at their disposal. The idea is awfully simple: Using the “Overwhelming Chaos” rune, you can change the damage of any skill without a damage range into a damage range from 1%-250%. Sure, you might roll awfully low a couple of times but in general this is a buff since you have a potential 150% damage to gain from the rune. Now, Chaos skills already start with damage ranges with means that they are not affected by the rune at all, which is why I normally decide against using them in this sort of build. But as you will see there are other skills to take the place of the tried and tested.
- Using “Azramiel’s Blessing” asthe weapon of choice means access to “Ripple of Light” an insanely good holy skill. It starts with a sizeable area of effect due to the 35% bonus from character and weapon increases, deals damage both upon expanding and shrinking (which also allows Negative effect chances to trigger twice), and it even comes with the Holy skill staple of critting for more damage, times three to be exact. One hell of a skill and a major force both during the early game for its high clear speed as well as the late game due to good damage and low cooldown.
- Since we have access to the buff skills and want to have as many AOEs as possible active at any given moment, “Arcane Power” is a definite inclusion into the build. Fun fact: Since it can technically also buff minions the buff skills all count as “Area”, which means that muulti-cast chance for “Area” skills will affect them and damage boosts for “Area” skills are translated into potency.
- “Bloodlust” is another welcome buff, being both defensively-minded since movement speed increases your survivability as well as a solid offense support due to casting your damaging skills more often. The “Area” part that I hinted at with “Arcane Power” is also true for “Bloodlust” by the way.
- I like “Flame Wave” for multiple reasons: It is an excellent crowd control tool since it not only inflicts damage and Burn for more damage and damage increases via Runes, but it also stuns opponents which makes it more unlikely that normal enemies will catch you off-guard.- Combine this with a relatively low cooldown and you have a solid skill to work with in this build.
- Other than that, you really can decide to go for whatever classifies as an “Area” skill. “Smite” is rather slow and inconsistent with damage, but gives you a solid healing option in later phases of the run and makes “Holy”-themed buffs more likely to drop which is something that “Ripple of Light” appreciates. “Meteor” is also rather random, but has a low cooldown and therefore the potential to drop in large numbers combined with multi-cast. And “Avalanche” is somewhat tricky to aim but can deal amazing damage if you can target the bosses without being flooded by red circles.
The idea, as I already mentioned, is really siomple: Flood the screen with AOEs. The idea is still to apply Negative effects to increase the efficiency of your build, both via their effects as well as improving runes like “Executioner” but since you cannot guarantee the negative effect spread (since that is a Chaos skill theme), I would go heavily into gaining the On-Hit effects and both mopre damage and AOE. Thankfully, you are not without any negative effect spread at all since you should gain 7.5% on every skill due to the a skill in “The Chaoswalker’s” skill tree giving you that bonus, and an additional 20% chance due to the rune “Misfortune’s Embrace”. And since I am already talking about the runes to use, here is what I would go for with this build:

“Dash Mastery” for better dashes is in my opinion of paramount importance for survival and therefore a surefire pick. With the high number of potential negative effects, “Executioner” still gives tons of extra damage despite its nerf, while “Misfortune’s Embrace” gives a higher chance of negative effect spread. “Overwhelming Chaos” is what makes this build tick in the first place so it has to be included and since the build uses lots of big multi-hitting attacks I went for “Decapitator” to increase clear speeds via instant kill chance. (Rune Cost: 9)
