Easter Egg Decorating Ideas – How To Make Pisanki
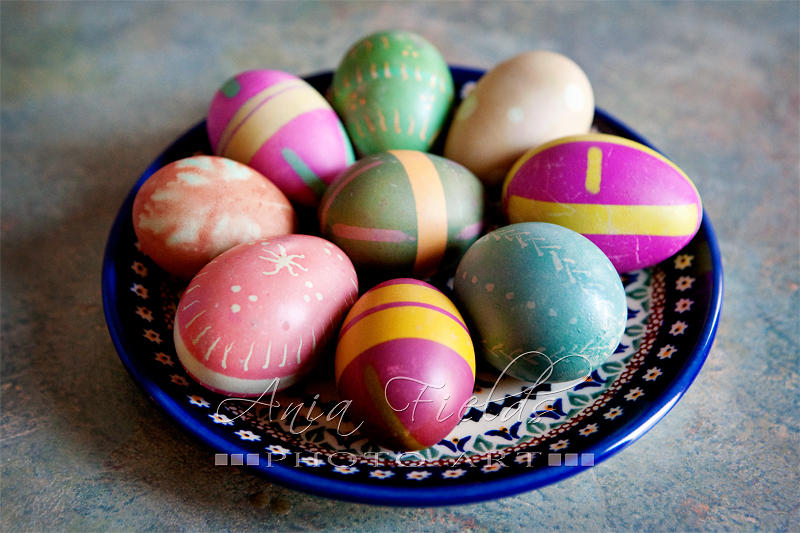
Growing up in Poland one of my favorite Easter traditions was decorating eggs. There are a lot of different techniques but the end result is always called “pisanki”. I introduced my kids to this tradition and almost every year we make our own pisanki. Yesterday we felt quite creative and spent our afternoon trying some new (for us) Easter egg decorating ideas. Here is our end result, and keep reading if you want to learn how to make pisanki…
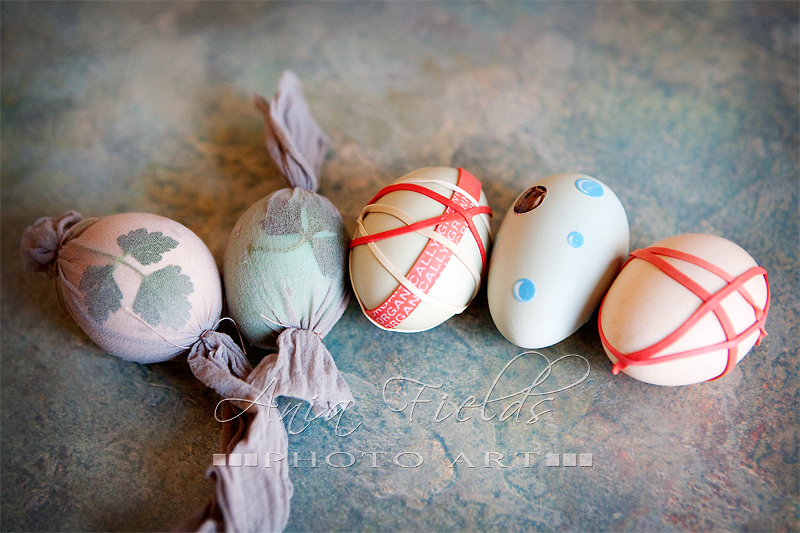
We first hard boiled all our eggs and then used food coloring and onion peels for cold dying the eggs and three different decorating techniques. This is how messy our kitchen looked:
Alek was experimenting with rubber band egg dying. He first wrapped the eggs with rubber bands and then was placing them in different color dyes, twice or three times to end up with quite colorful bold looking eggs. Handy tip: wide bands (like the ones from broccoli at the store) worked much better than thin ones. 🙂
Sonia tried a different decorating technique: botanical egg printing. We chose a few perfect parsley leaves, placed them on an egg (using water to “glue” them well) and then wrapped everything carefully in a piece of old nylon stocking. It was quite challenging to tie everything tightly but we managed and then we placed the egg into an onion peel dye. We took it out after half hour and cut the nylon. Unfortunately it turned out that we didn’t tie the nylon tight enough and as a result the dye sipped under the leaves. A lesson learned: next time we’ll have to wrap the stocking better.
I wanted to learn how to make Polish pisanki with wax. My grandma in Poland always made some traditional painted Easter eggs, but I never asked her to teach me, which now I regret… I remember she was using some special tool to apply melted wax onto an egg. I don’t have it, so instead I used a pin pushed into an old pencil with an eraser to “paint” my patterns. I read on internet that it’s important to use a beeswax candle, fortunately we had some at home. I lit the candle, let it melt a little, heated the pin in a flame and then dipped it into the hot wax below and immediately applied it to the egg. I was only able to paint tiny patterns on my eggs and I had to work quickly because my candle was burning up fast and the wax on the pin was cooling quickly as well. Here is a link to a great video I found online where you can see the technique in action. After I painted all the pattern my egg was ready to be dyed. I placed it in a colorful bath for a few minutes and I then had to remove the wax by holding the egg over a lit candle to first melt it off and then rub off with a napkin. I’m happy with my first try at this traditional Polish pisanki with wax. Here is how they turned out:
It was fun to spend time together and experiment with different Easter egg decorating ideas. Tomorrow we’ll have friends over for dinner and we’ll have some cute eggs to share and eat. 🙂
come visit my website
say hello on Facebook


Comments
One Response to “Easter Egg Decorating Ideas – How To Make Pisanki”